Wookieepedia
Lenos Expo Booths: How to Allow Exhibitors to Design their Booth
Exhibitors can login to the website and design their booths on their own. To enable this, please follow the steps below.
Event Administrator Steps
  • Create an email template with login instructions that will guide exhibitors on how to login to the Exhibitor Hall and manage their booths.
  • Send this email to exhibitor(s) via the Lenos Reports Portal.
 
Exhibitor Steps
  • The exhibitor will log in to the website based on the instructions provided on the email that was sent by the event administrator.
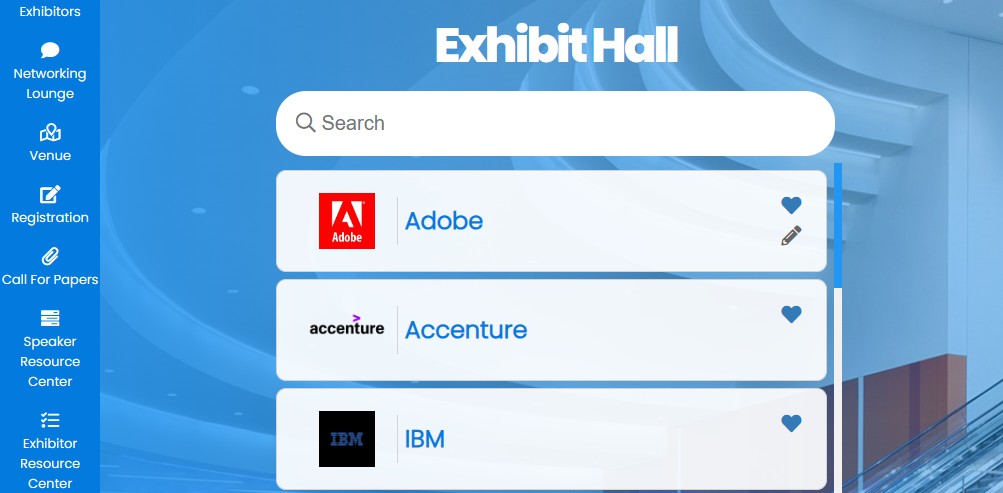
  • Upon login, the exhibitor sees the list of exhibitors. On this list, the first row is reserved for the logged-in exhibitor with an edit (pen icon) function for convenience as shown below.

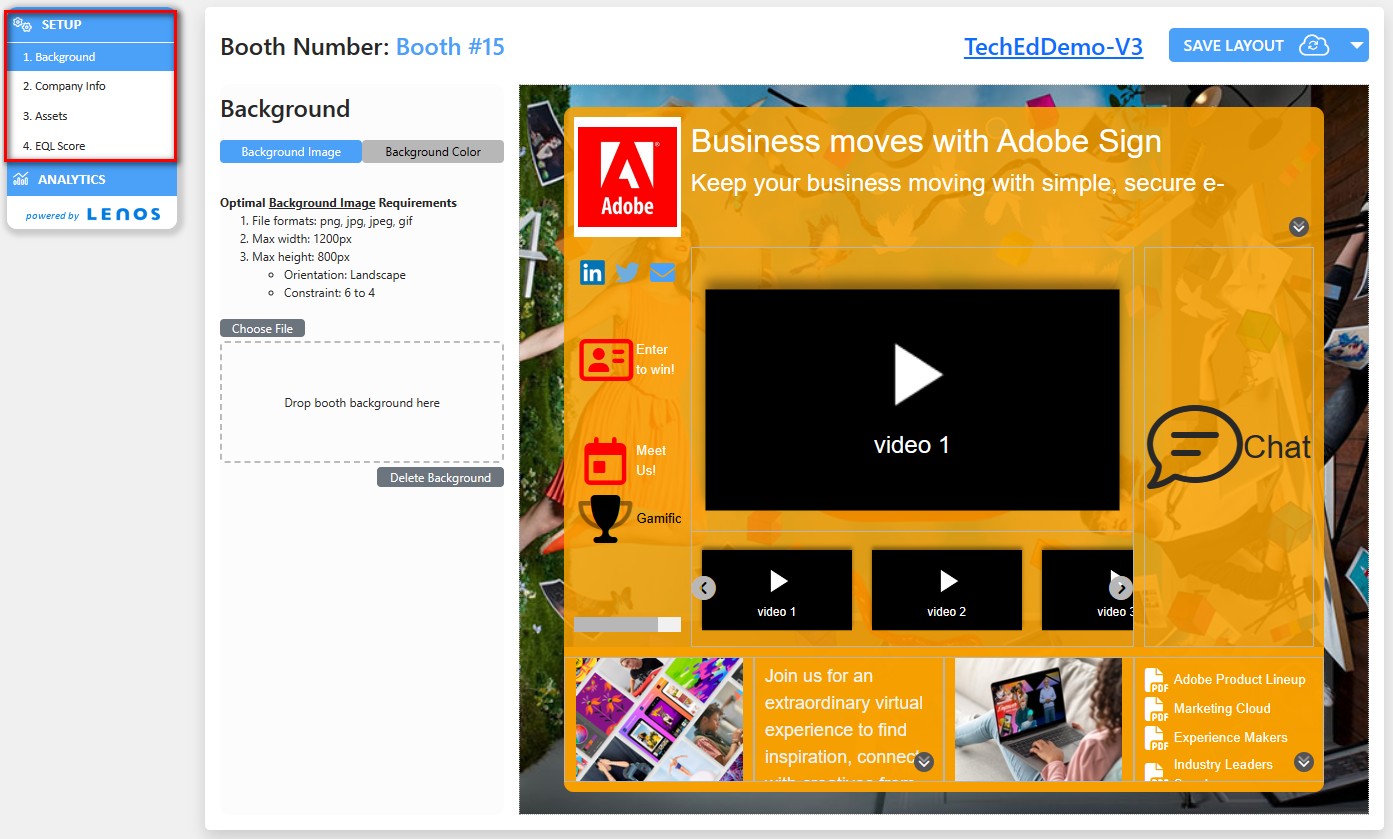
  • By clicking the pen icon, the exhibitor is taken to the Booth Designer page which lets the exhibitor to layout the booth as desired.
How to Design the Booth
Once the Booth Designer page loads, from the left-hand side navigation, follow the steps to:
  • design the background
  • enter company details
  • add/remove assets
  • configure EQL (Event Qualified Lead) score
Background Color
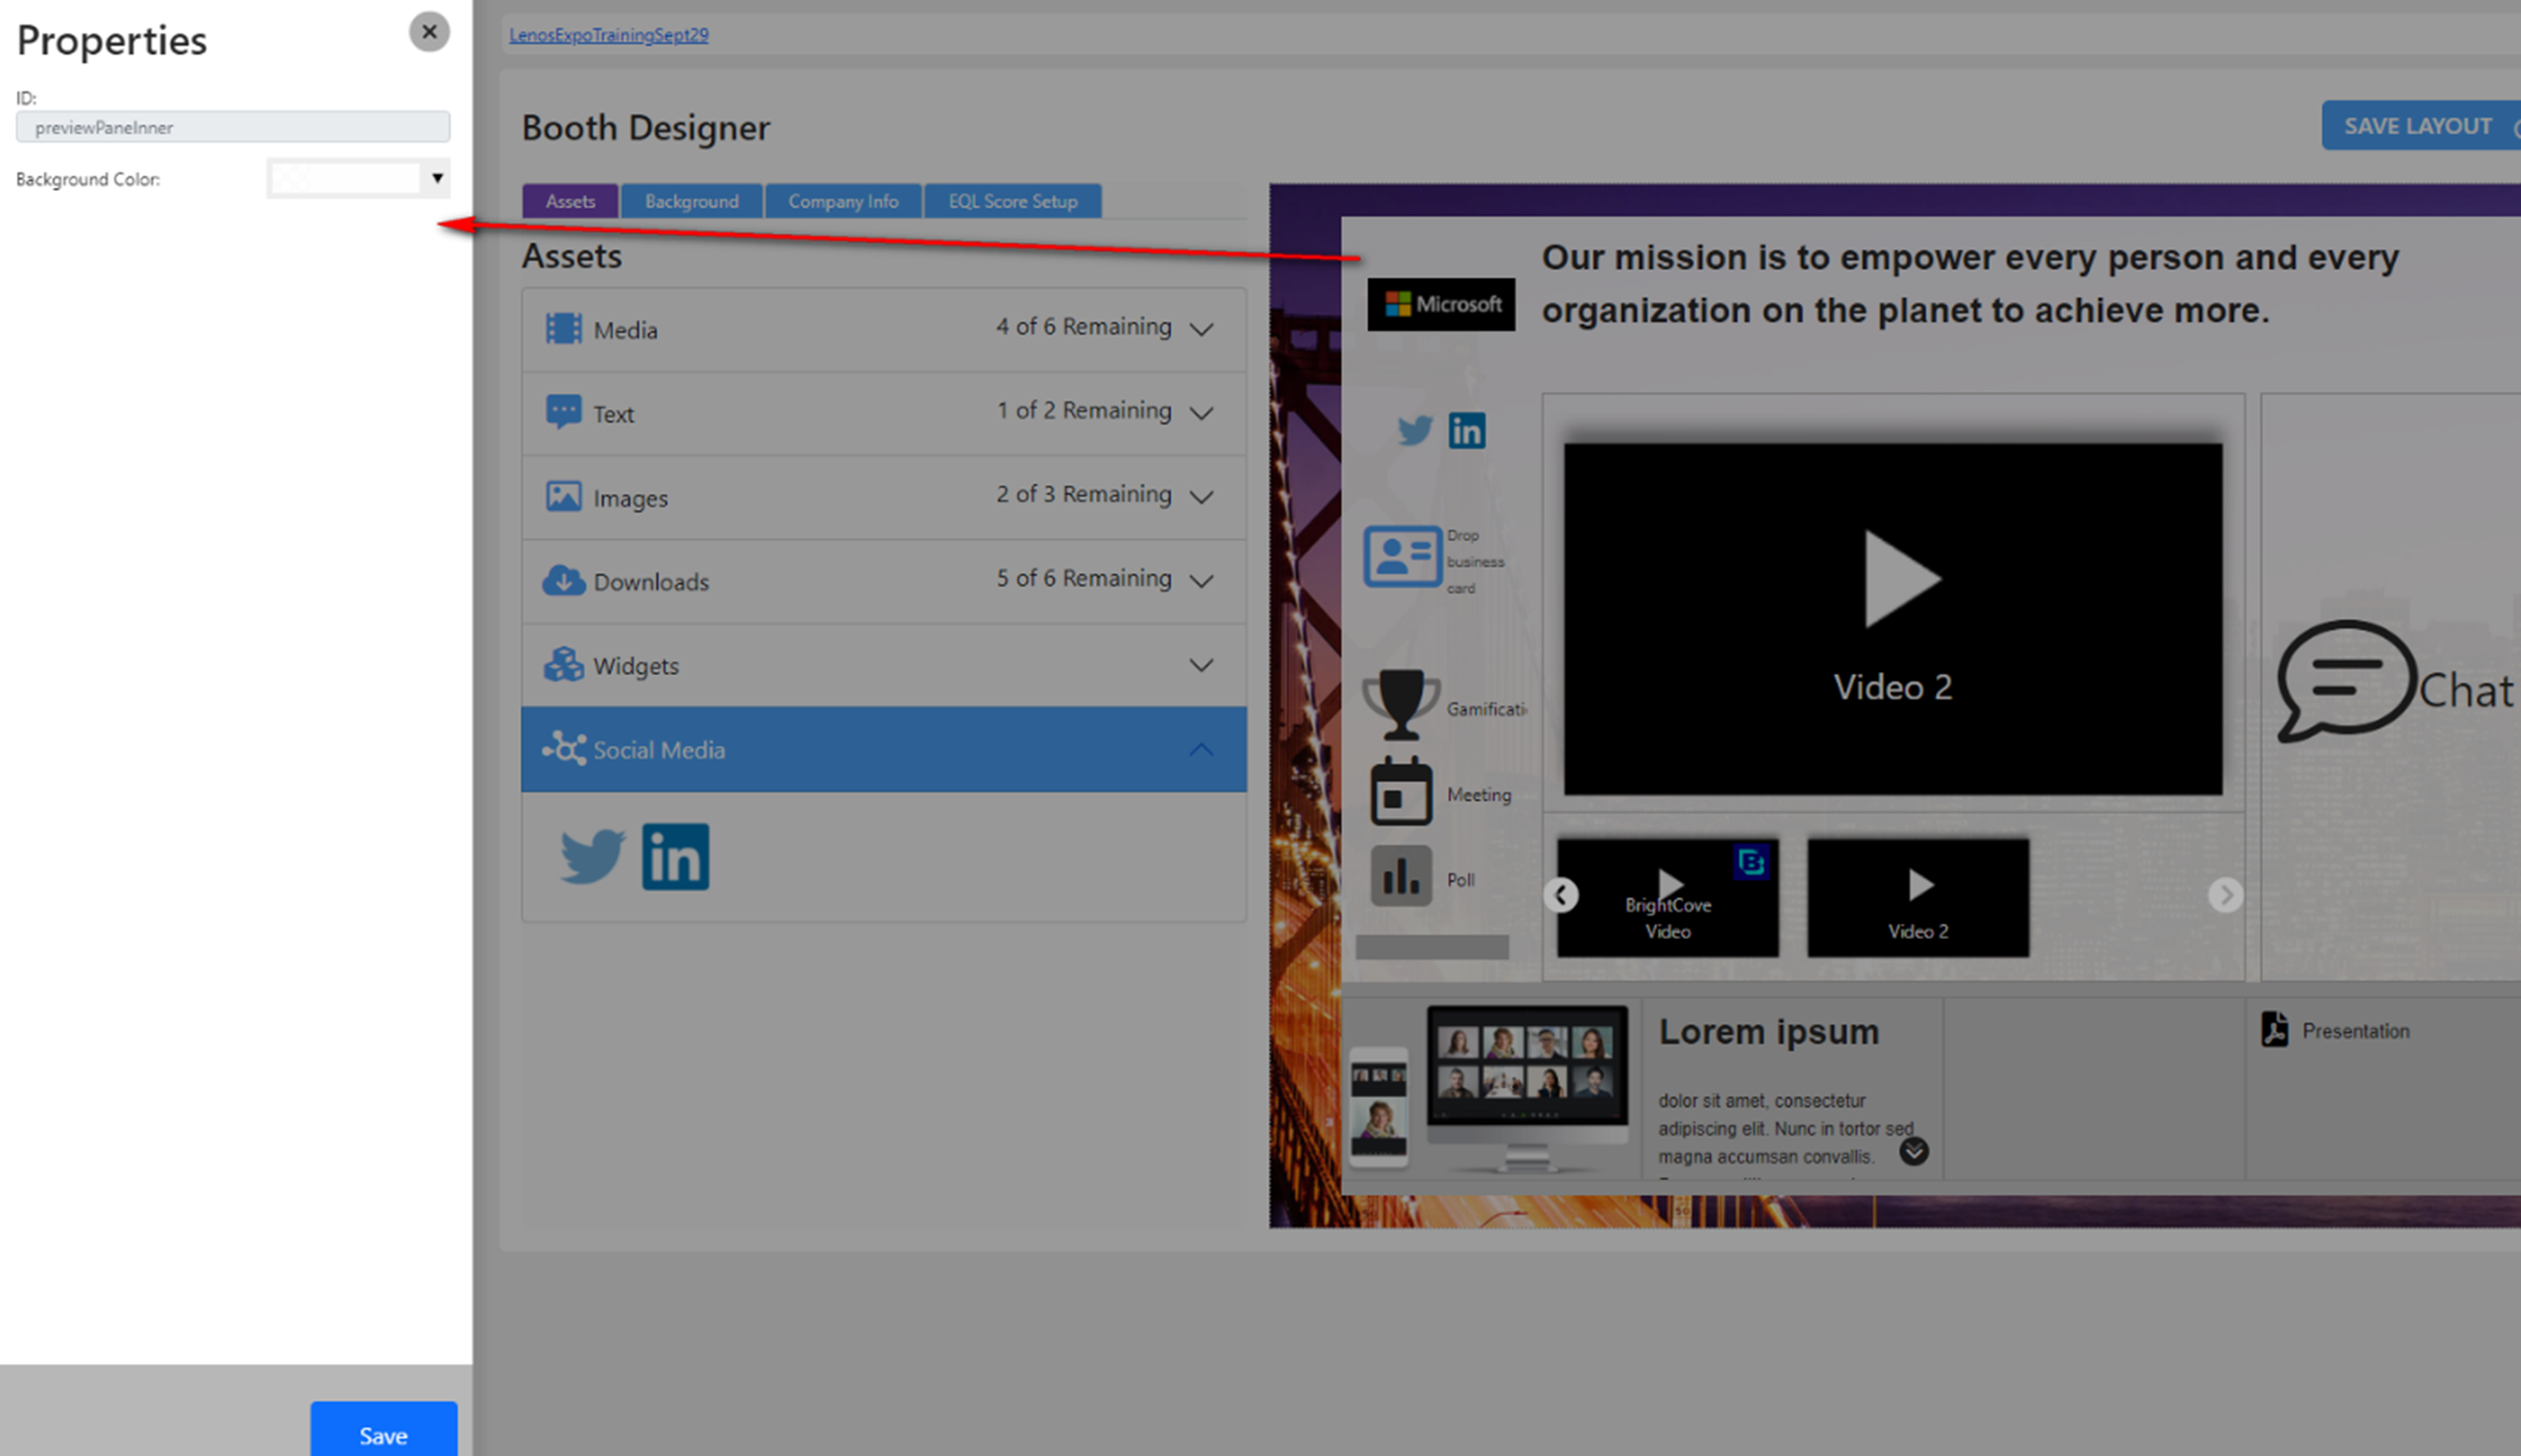
You can easily change the layout background color by clicking on an empty area like shown below:
Assets - Video
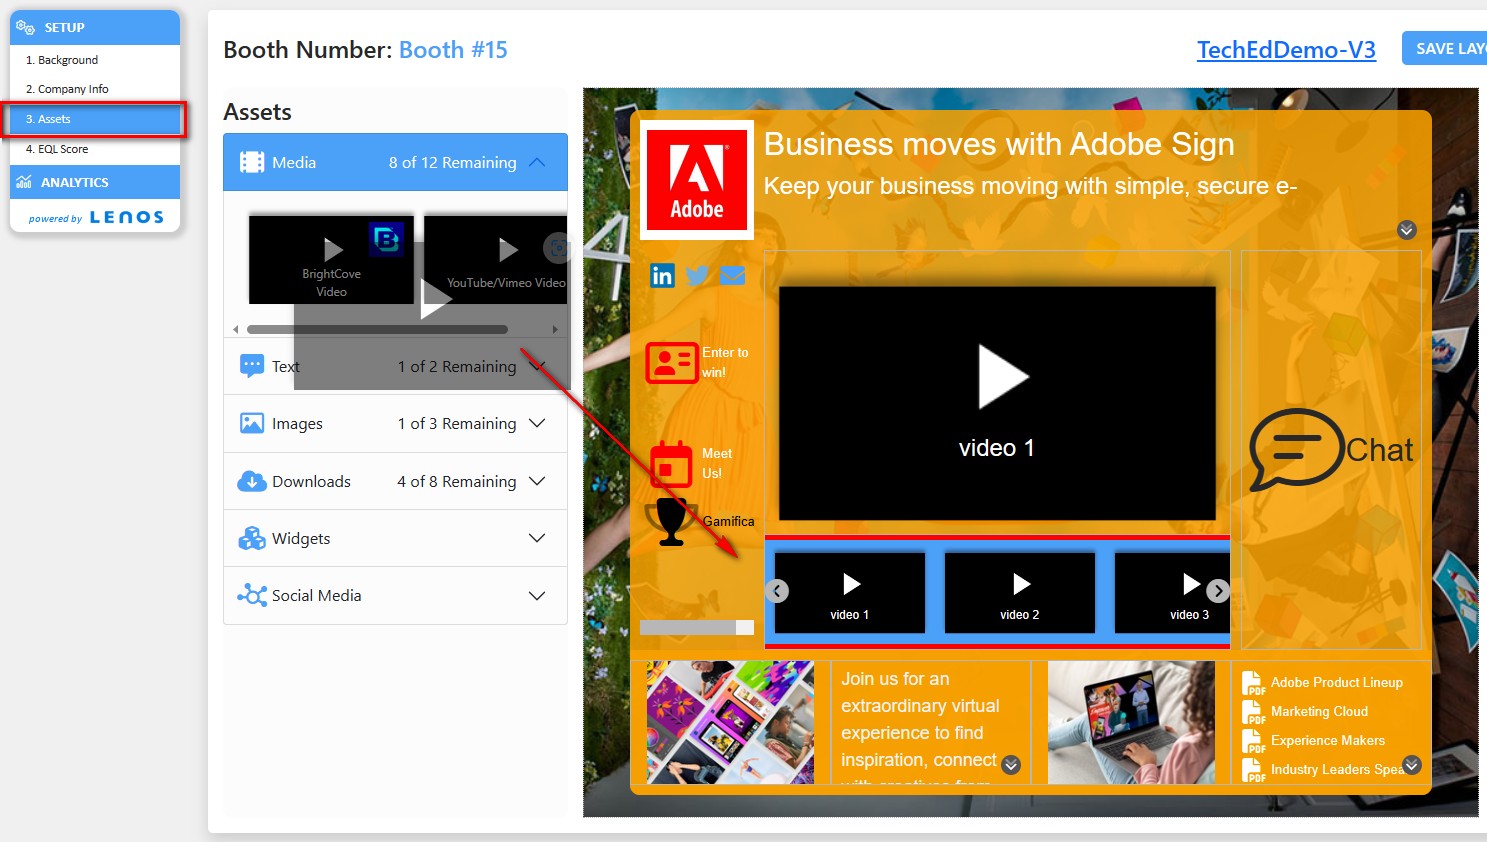
You can simply drag the assets to the layout column. As you are dragging assets, the UI will guide you and let you drop the assets on the reserved spaces for those specific assets.
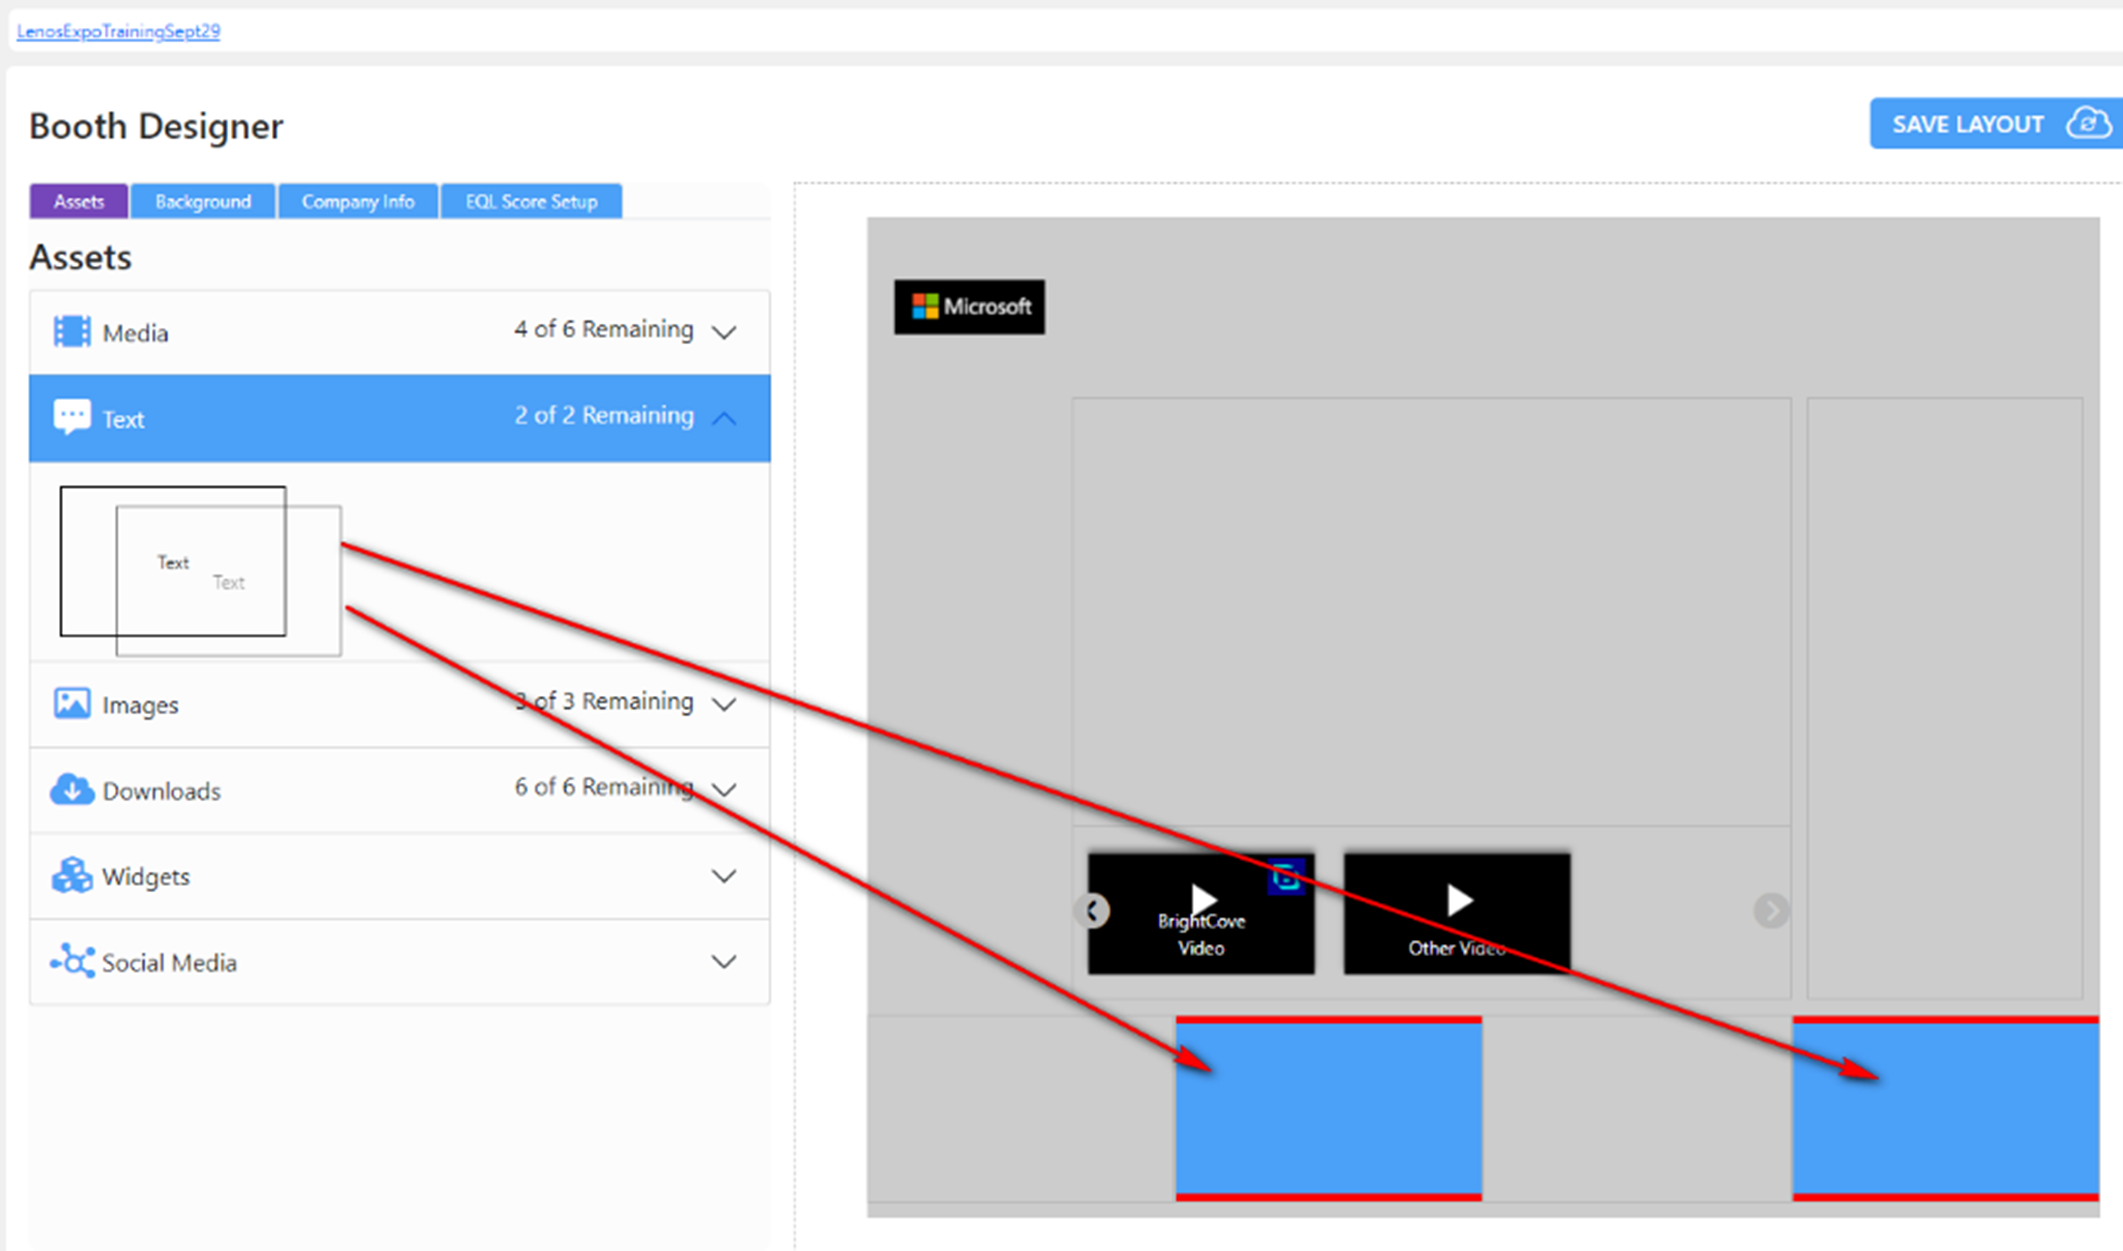
Assets - Insert Text
You can insert text blocks in designated areas as shown below.
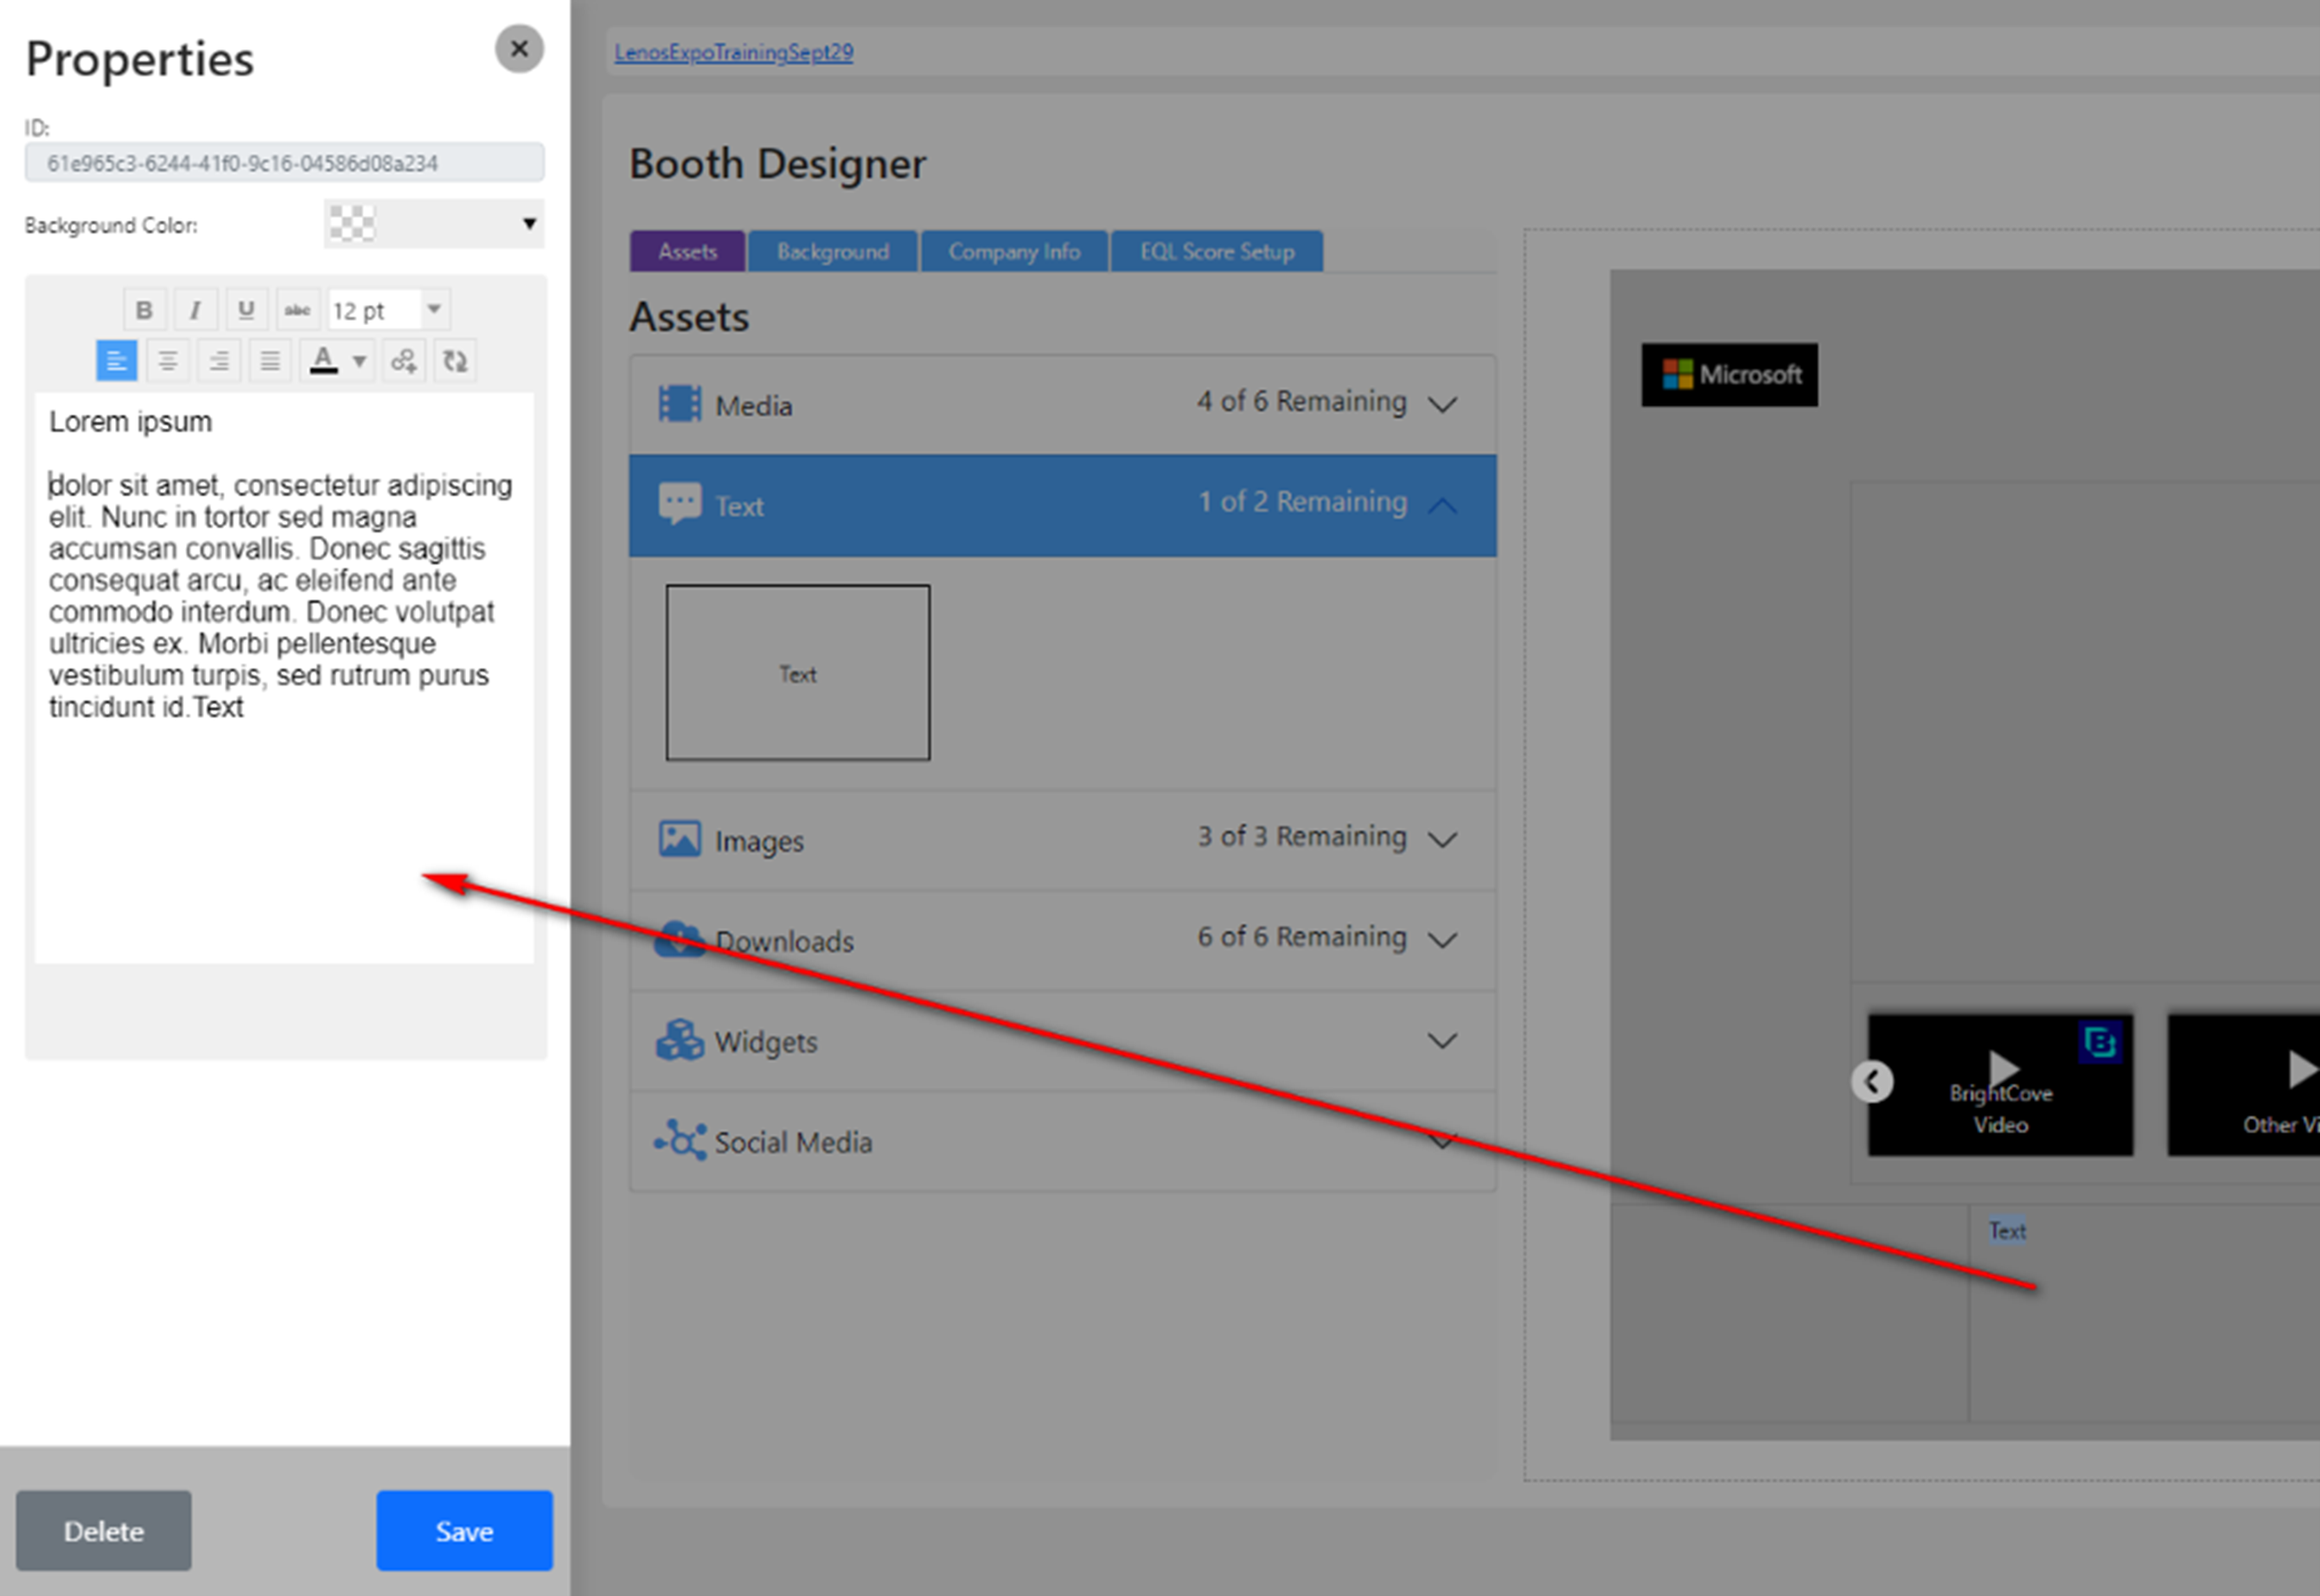
Once the text block is inserted into the designated area, click on it to expose the Properties panel located on the left-hand side as shown below.
From the Properties panel you can:
  • Change the background color of the text block
  • Format the text like you would do on a word document
  • Click Save button to complete.
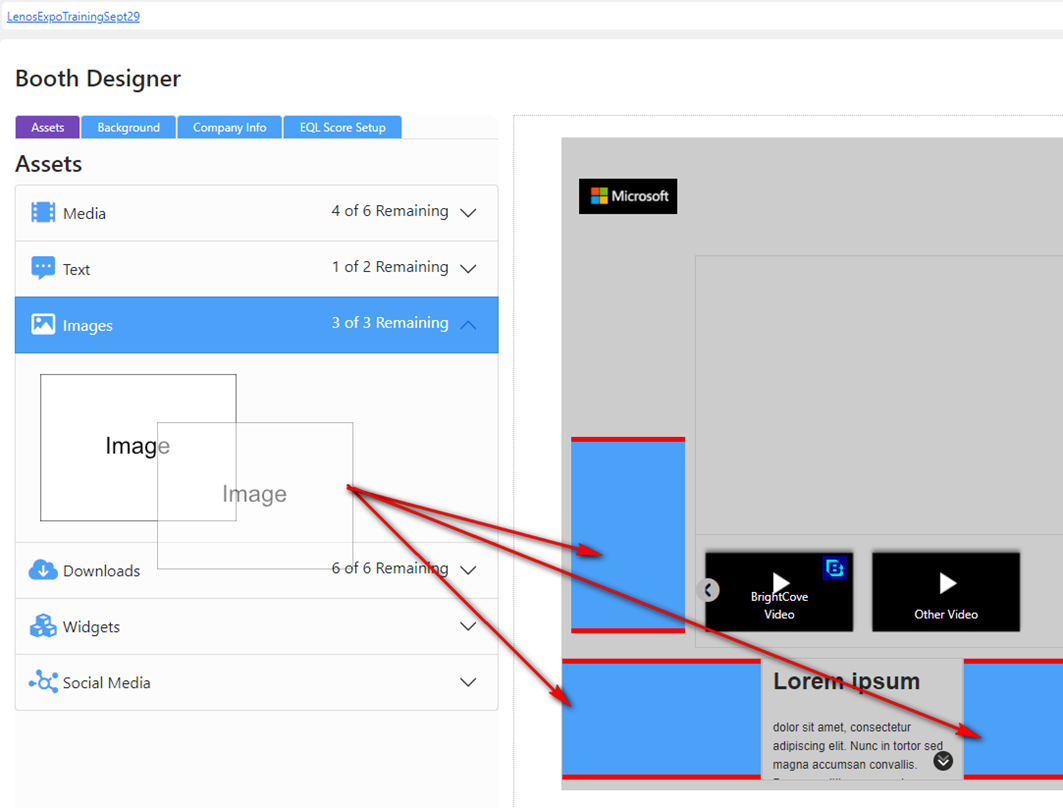
Assets - Insert Image
You can insert images to designated areas as shown below:
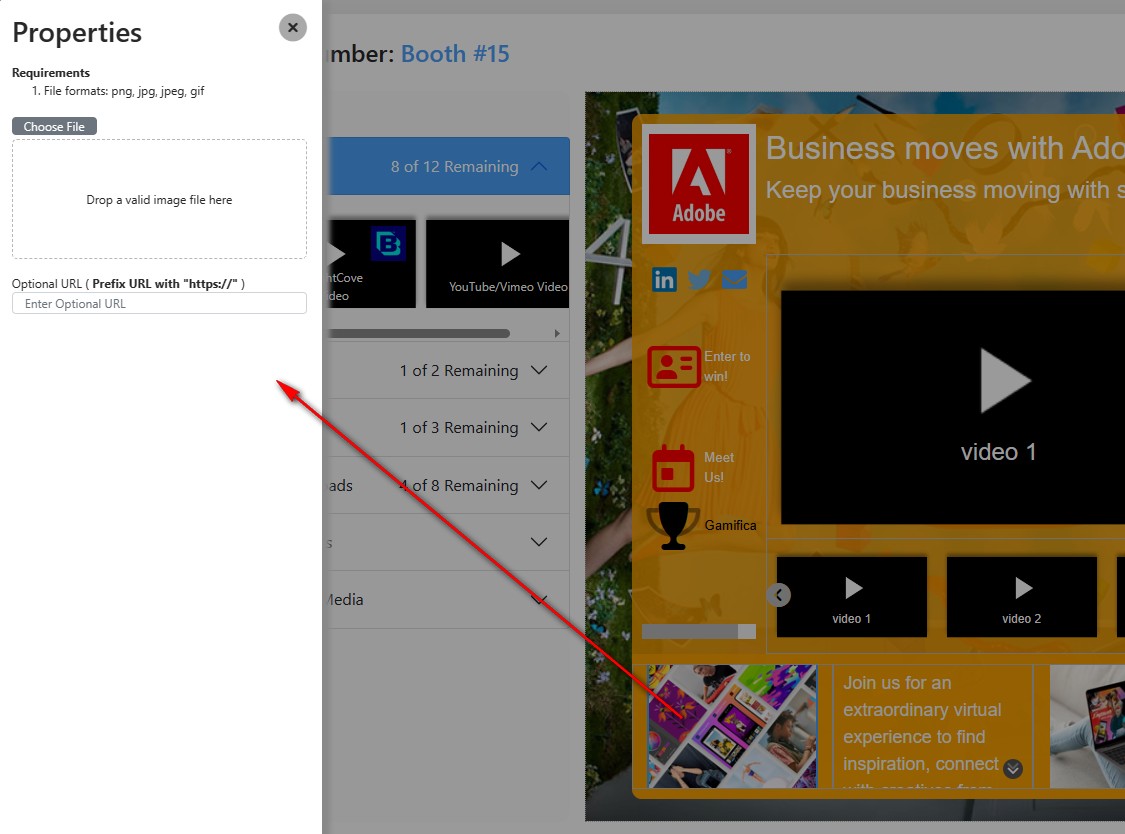
Once the Image object is inserted into the designated area, click on it to expose the Properties panel located on the left-hand side as shown below.
From the Properties panel you can:
  • Drag the and drop the image file from your desktop into the designated area as shown above.
  • Enter a URL if you need this image to be a hyperlink.
  • Click Save button to complete.
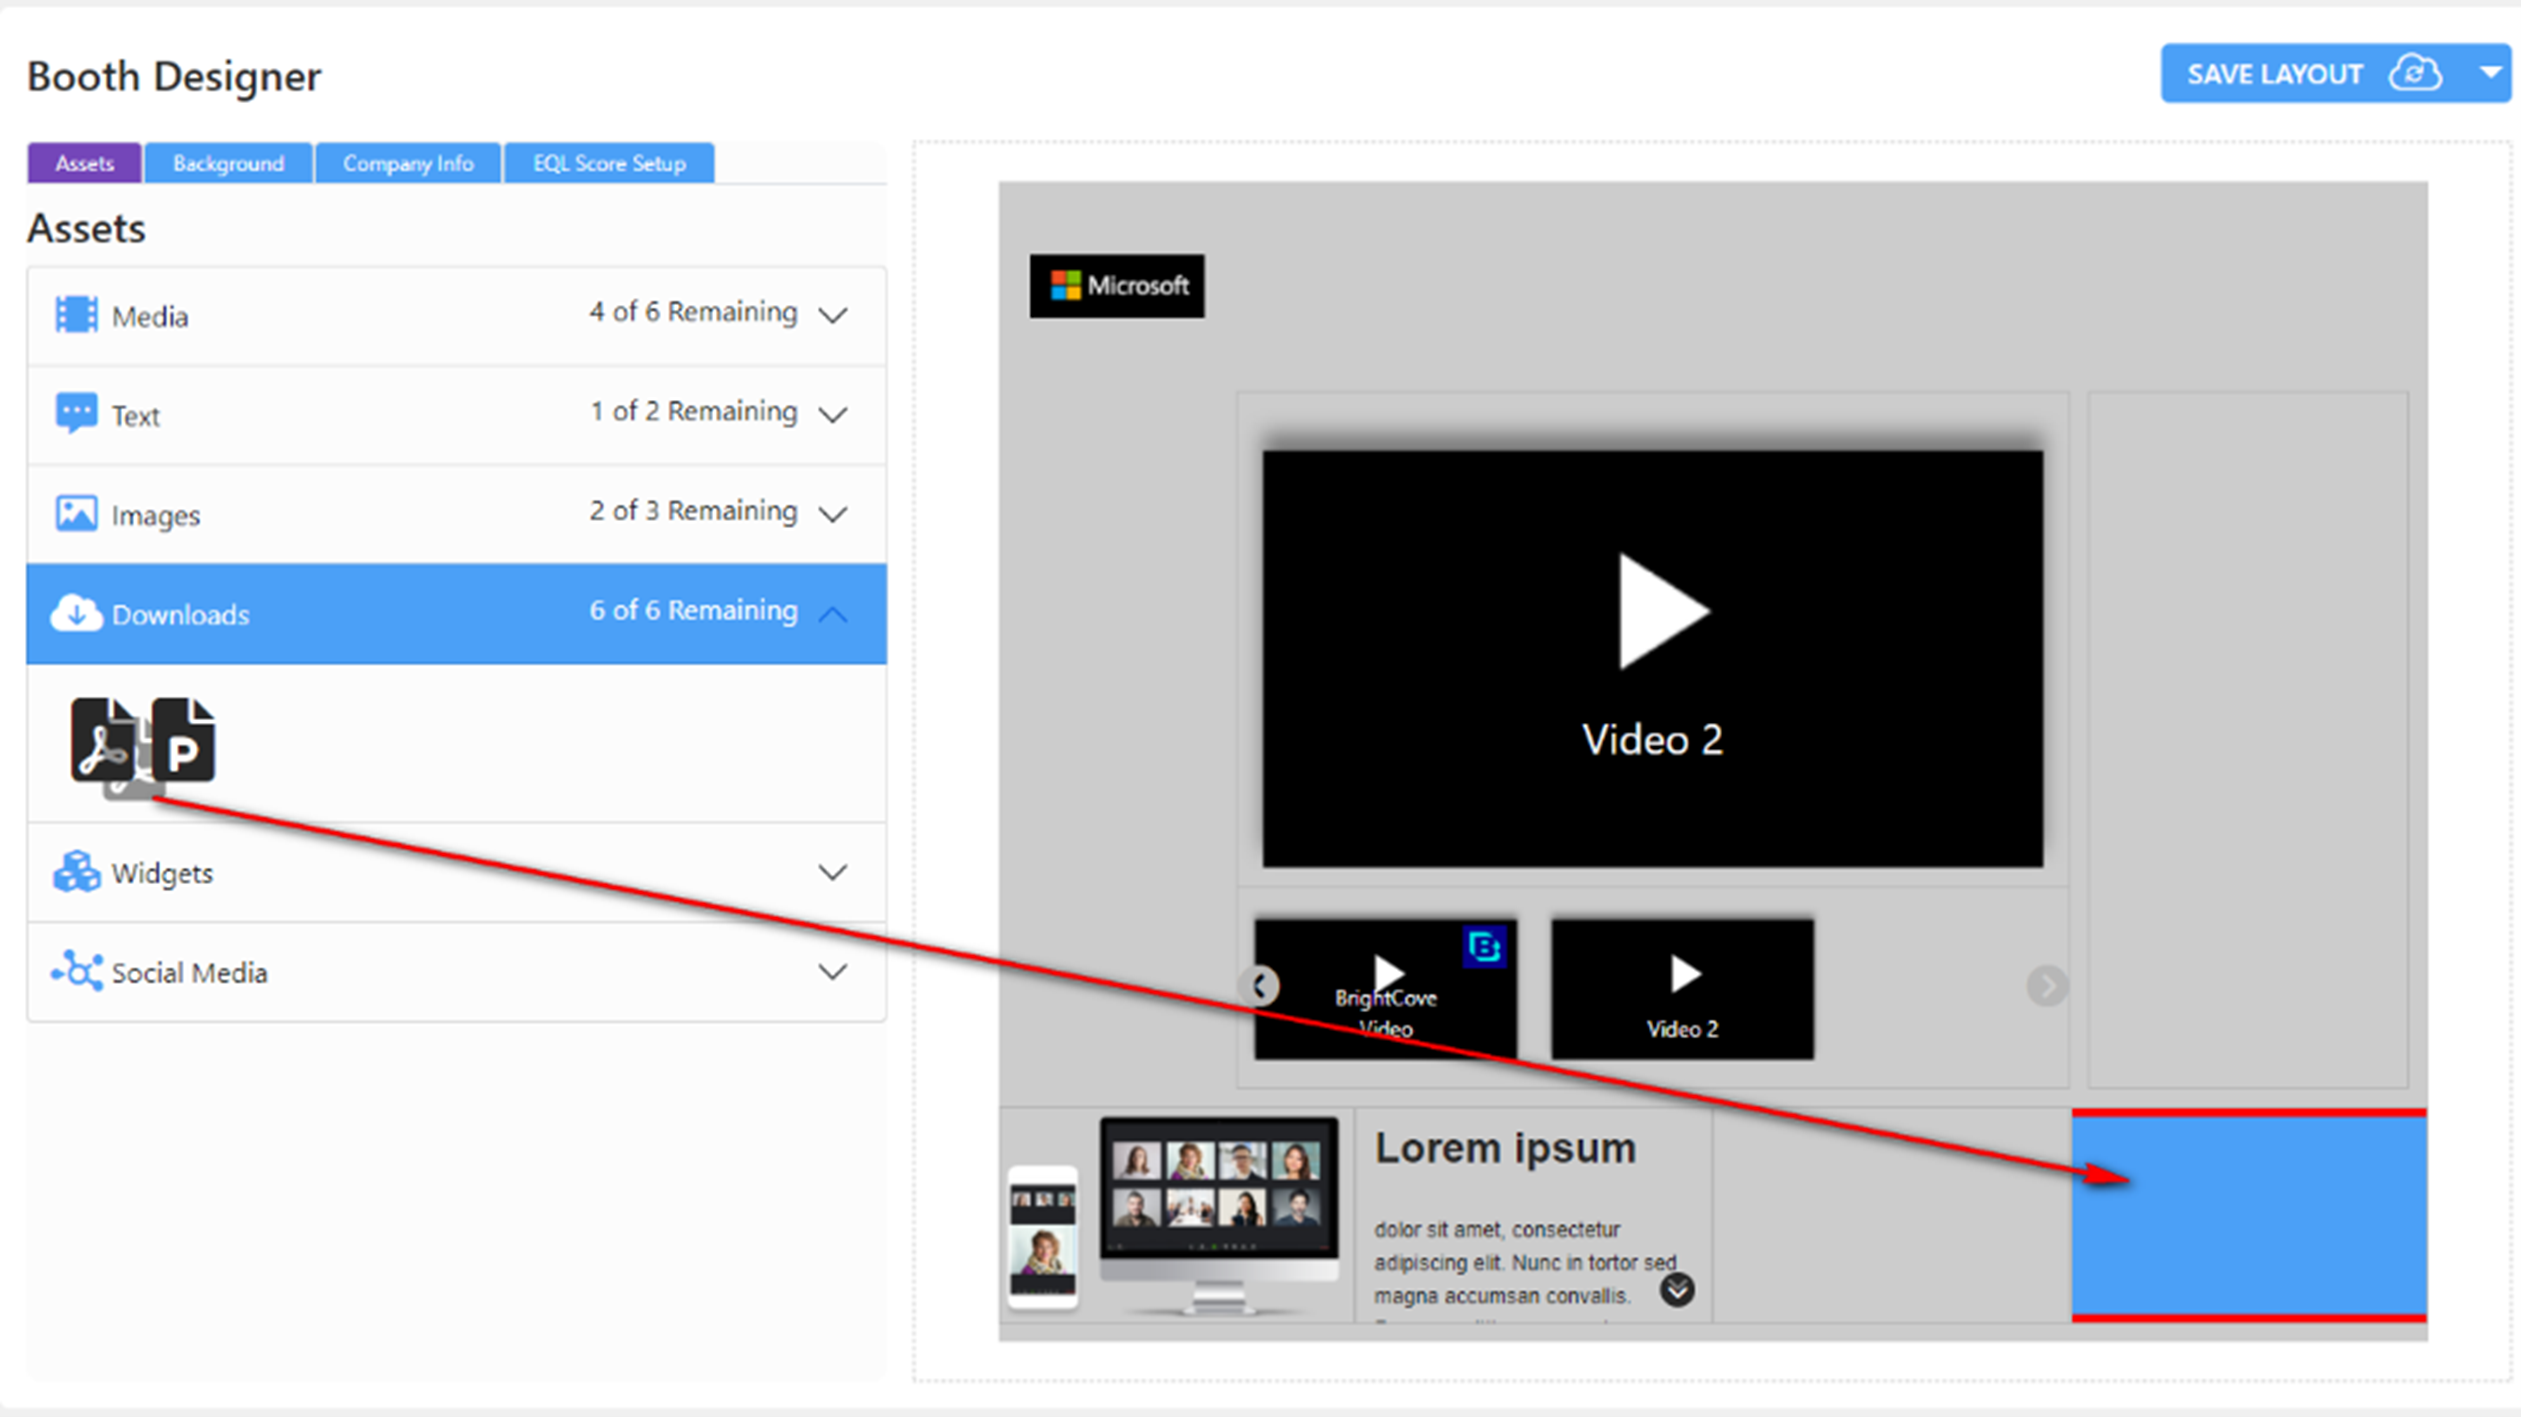
Assets - Insert Downloads
You can insert downloadable files (pdf, ppt) into the designated area as shown below:
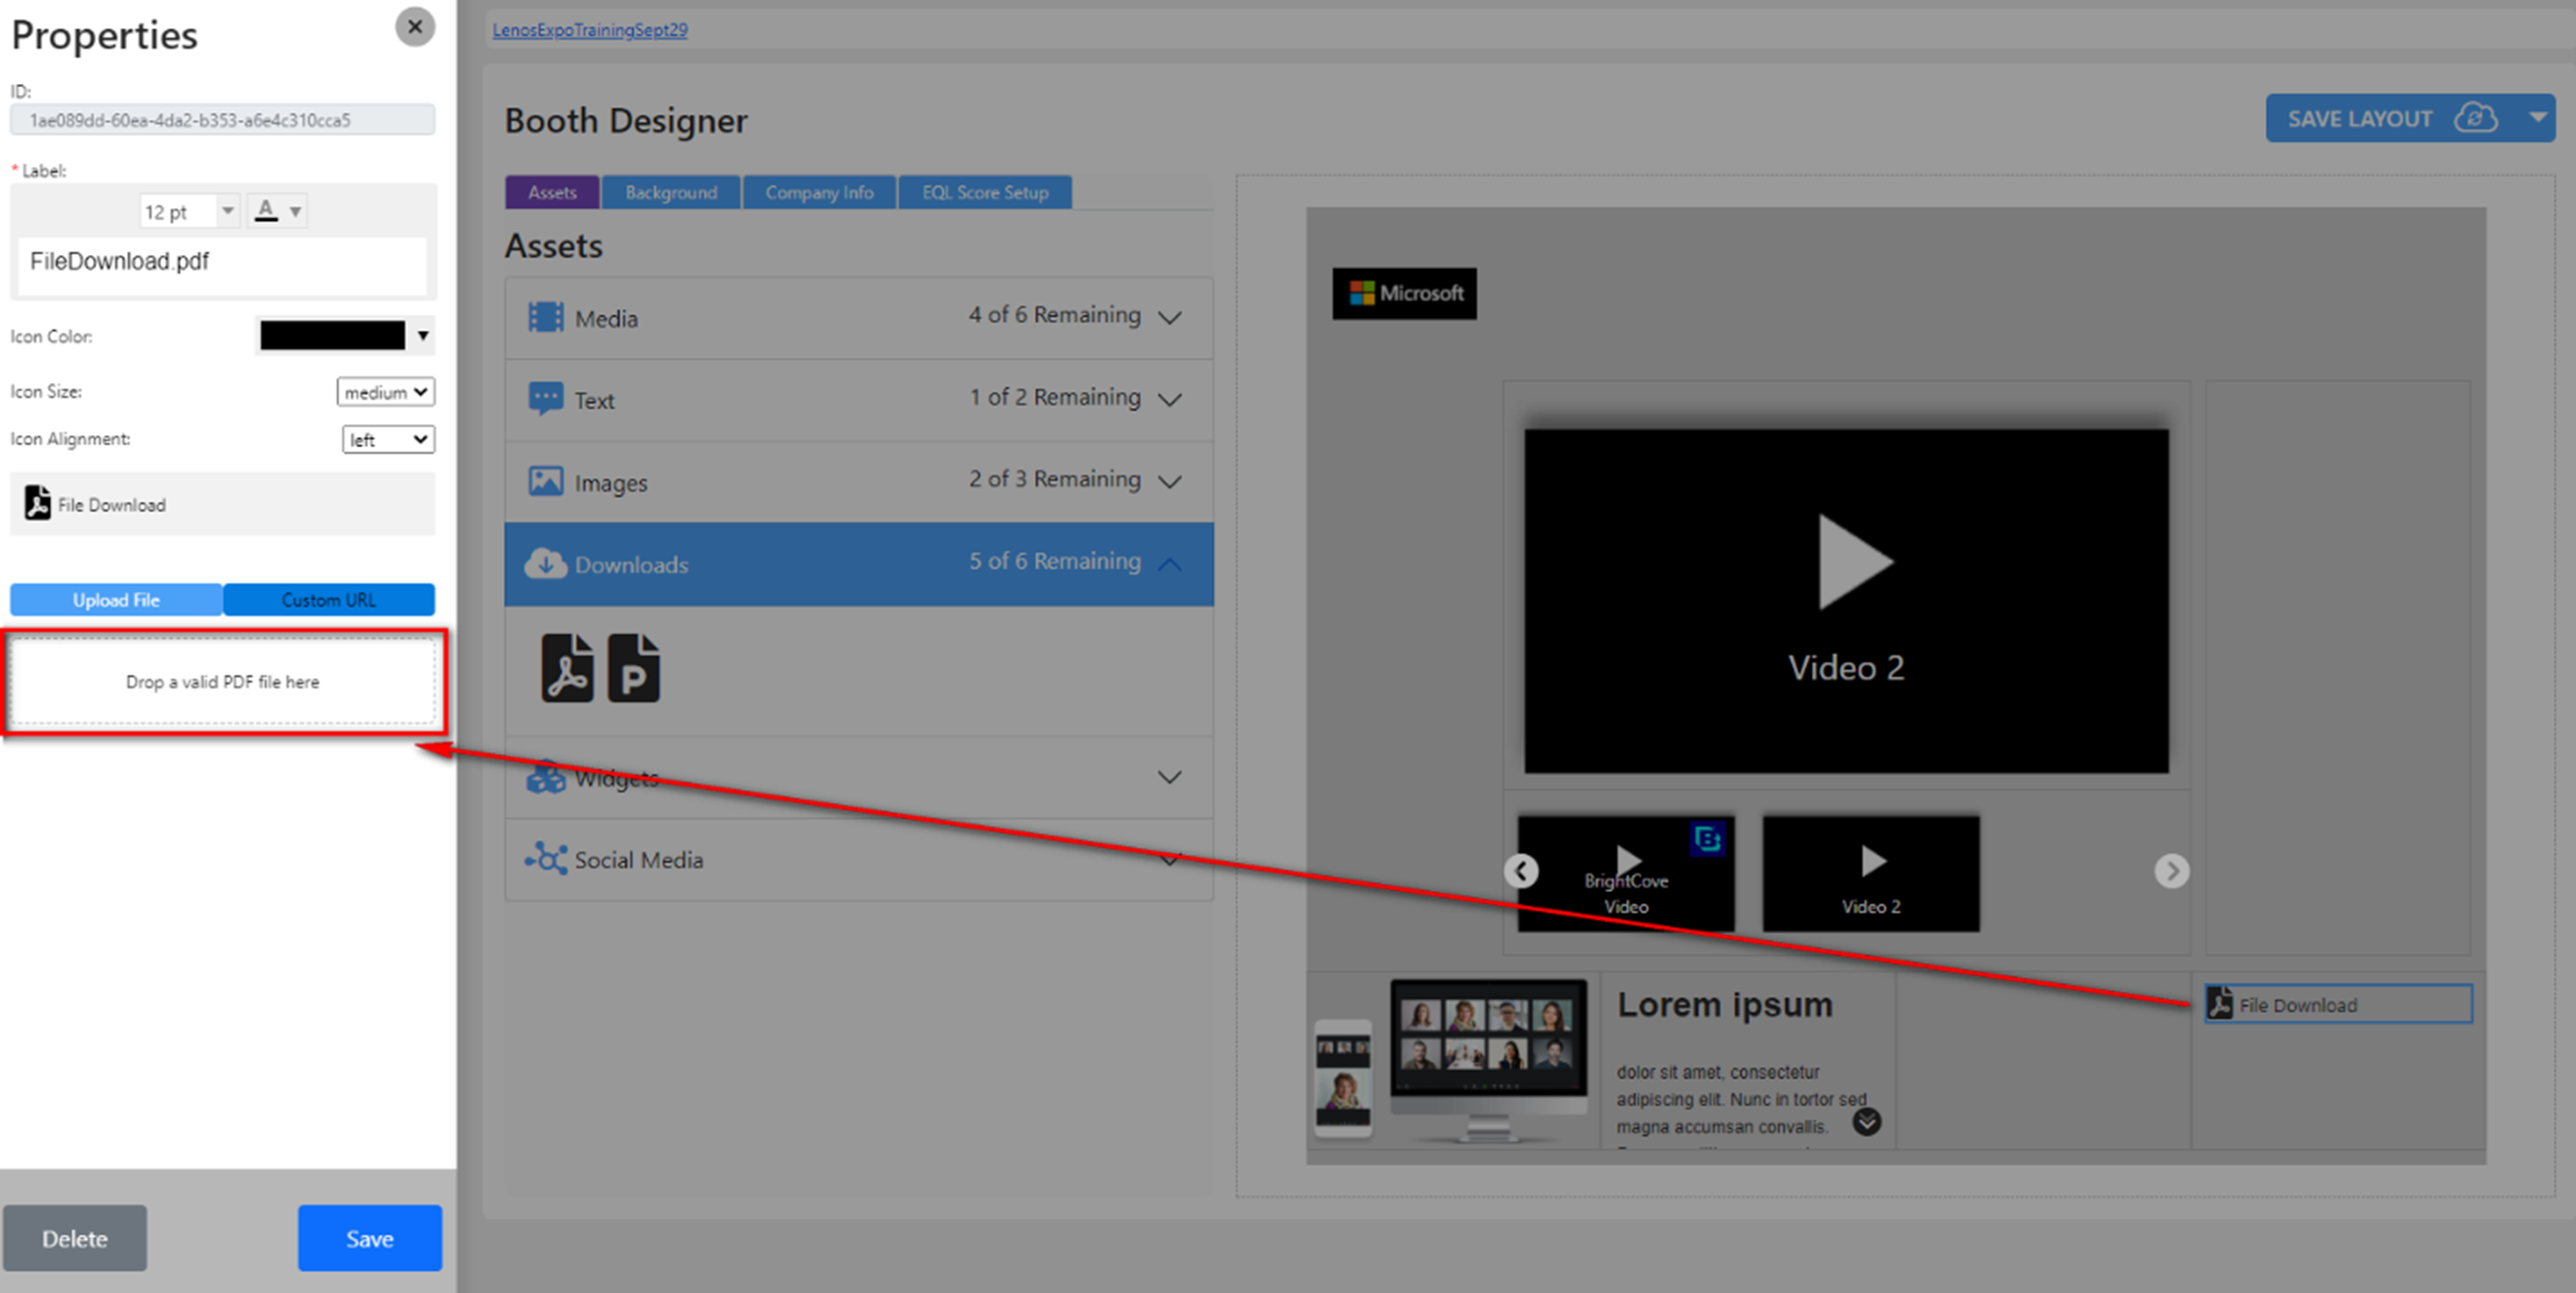
Once the Downloads object is inserted into the designated area, click on it to expose the Properties panel located on the left-hand side as shown below.
From the Properties panel you can:
  • Drag and drop the pdf or ppt file from your desktop into the designated area as shown above.
  • Format how the label and the icon should display.
  • Click Save button to complete.
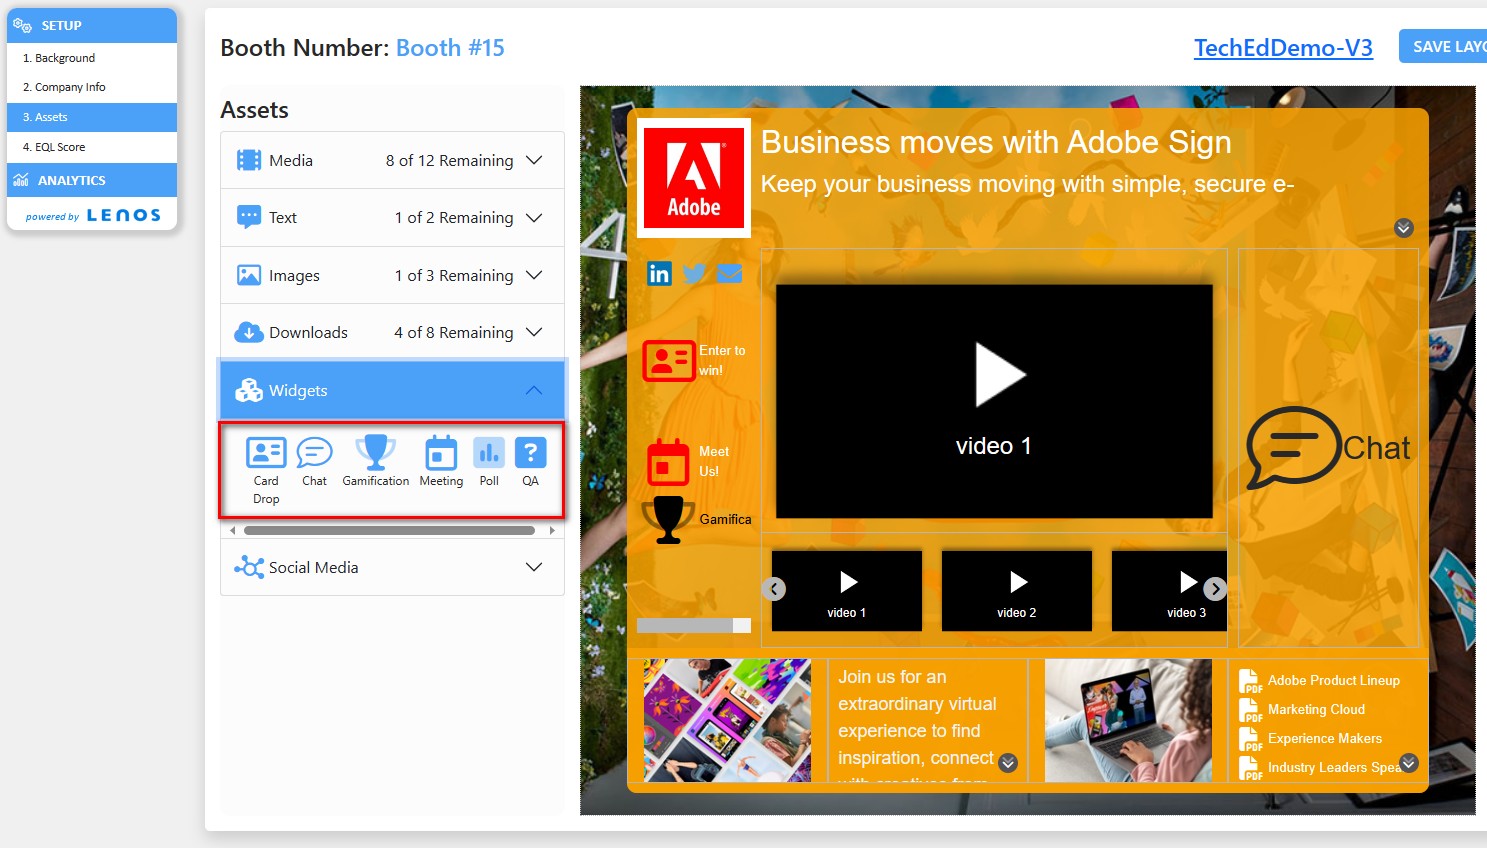
Assets - Insert Widgets
There are several widget options to make your booth interactive.
Drag and drop the objects listed below into the designated areas and click on the inserted objects one by one to expose the Properties panel and make changes where necessary.
Widget options are:
  1. Card Drop
  2. Chat
  3. Gamification
  4. Meeting
  5. Poll
  6. Q&A
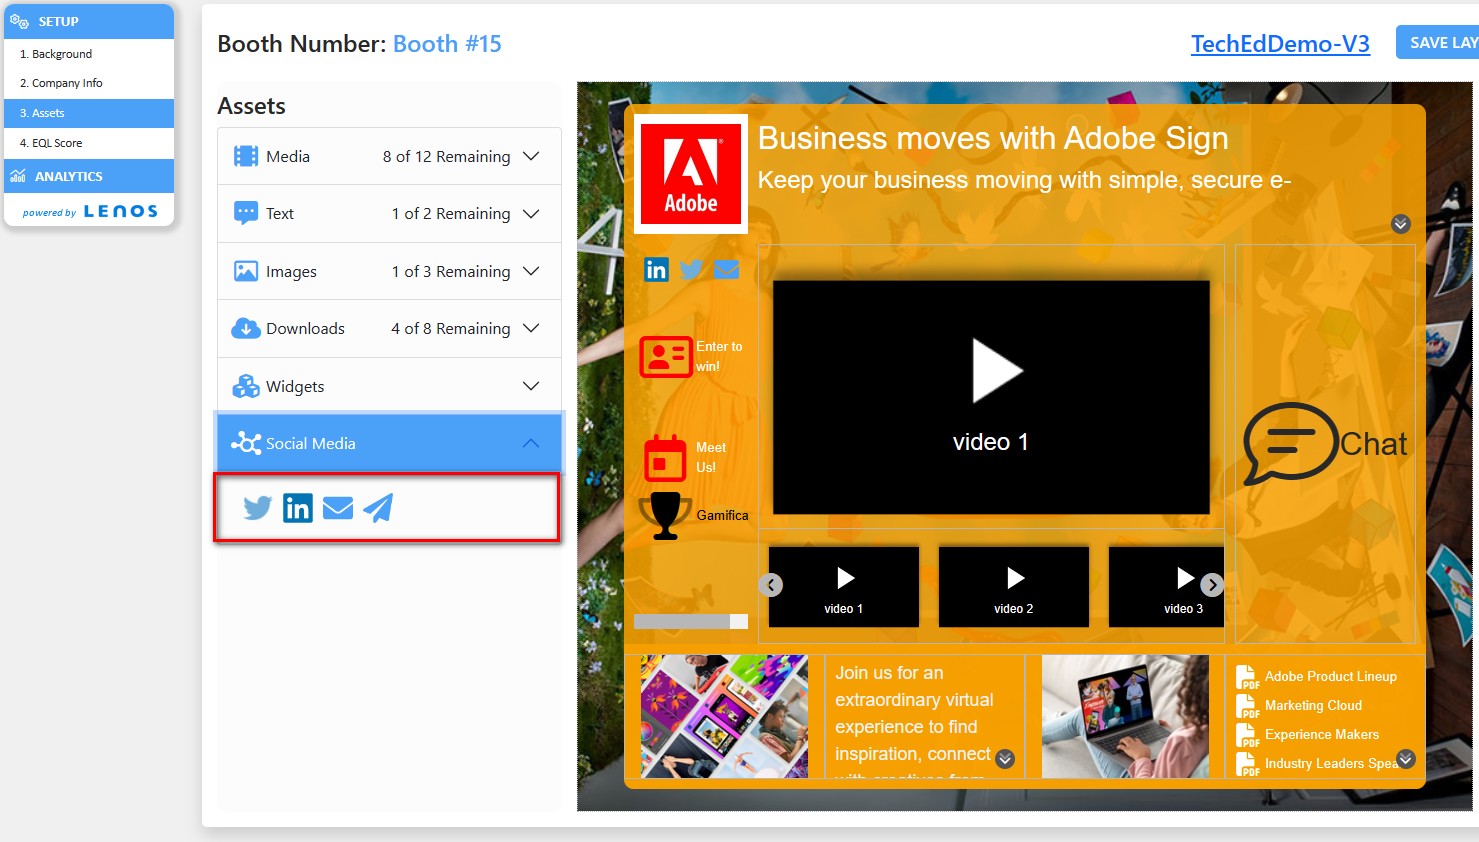
Assets - Insert Social Media
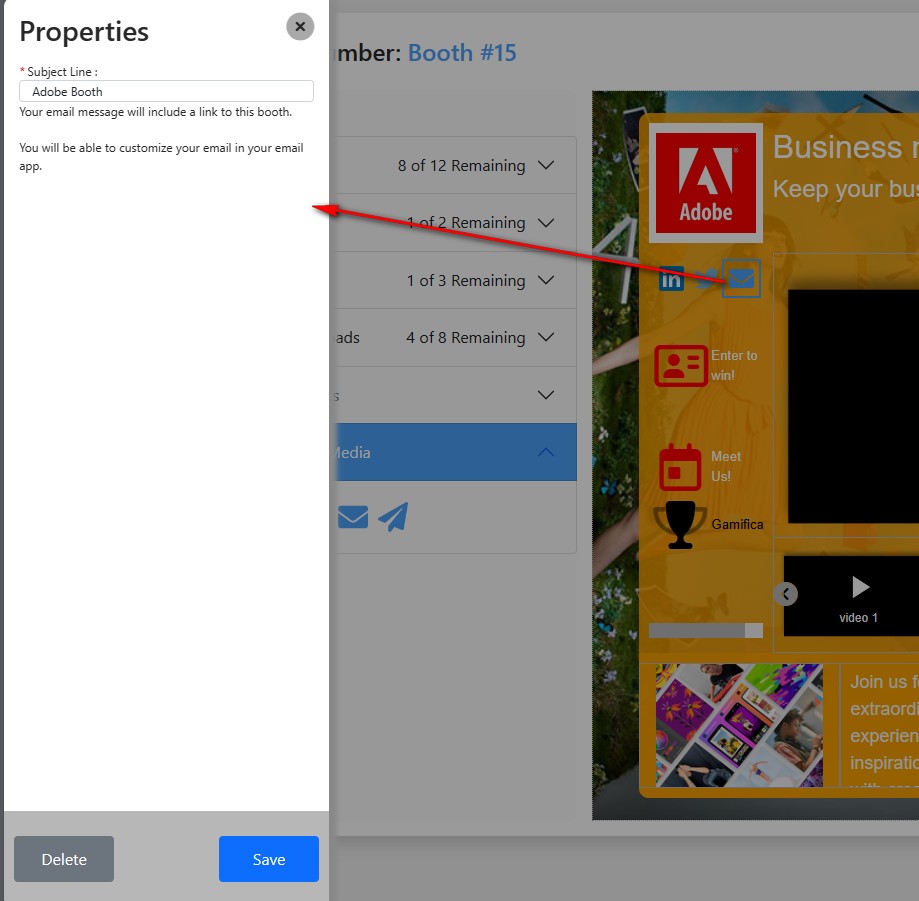
You can insert allowed social media objects in your booth as shown below.
Once the Social Media object is inserted into the designated area, click on it to expose the Properties panel located on the left-hand side as shown below.
From the Properties panel you can:
  • Enter the URL.
  • Click Save button to complete.
How to Save and Preview Your Booth
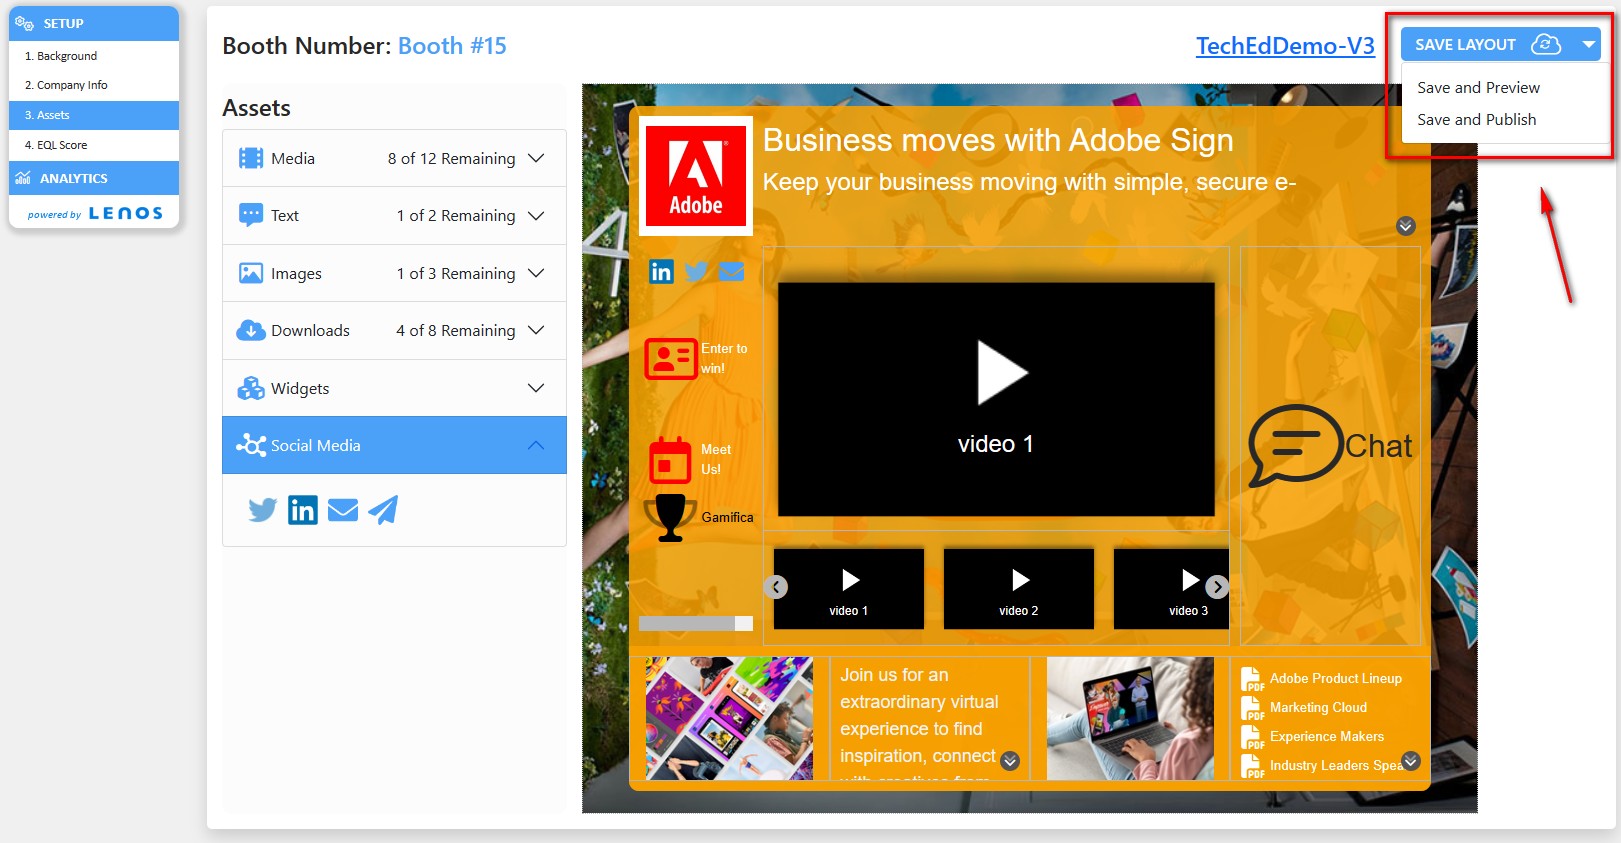
As shown below, you can save and preview your booth whenever you need.
  • Click the Save Layout button.
  • Select the option called Save and Publish.
 
Please note: Until you save and publish the Layout, your booth will not show up on the published event website.
This site is in preview mode.